Thermographic printing is a fantastic printing technique that is commonly used on greeting cards, wedding invitations, and other printed materials that require embossing with a natural look and feel to them. Some printers use this process to make printed font or image elements 3D-esque, as do many hobbyists who engage in the delights of crafts for their own homemade projects.
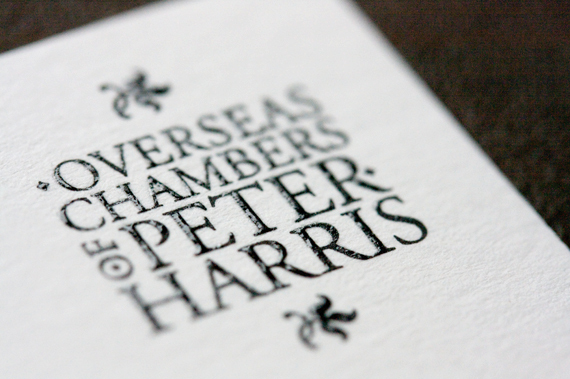
Image credit: The Potting Shed
To fully understand the art of thermography we are going to explain the processes that a printing company goes through to produce this great and somewhat forgotten method of print, in addition to a run through of how you can make your own crafty version of it at home.
The Origins of Thermography
Unfortunately the exact origins of thermography are not entirely clear but according to British Letterpress it dates back to a time when engraving was the preferred method of styling fonts or designs for high-class stationary and other substrate.
Engraving is a very traditional method of artistic printmaking and originally involved the engraving of a copper or zinc metal plate, which would produce the reverse of the intended design. The grooves created would then be filled with ink that transferred to the substrate (usually paper) under the application of high pressure, leaving a slightly raised print.
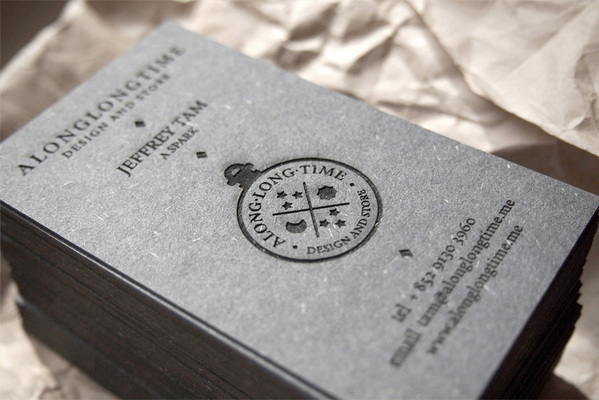
Image credit: Alonglongtime
Because new plates needed engraving for every project, which involved a great amount of time and skill, this method was, and still is, one of the most costly printing processes. Hence, thermography was born, providing raised print that utilised the moveable type printing presses at much more affordable prices for both the printers and consumers.
The Method of Thermographic Printing
Thermography normally involves three simple processes. To begin with we will explain the method used by professional printmakers, followed closely by a quick tutorial on how you can achieve the same embossed effect at home if you want to try it yourself.
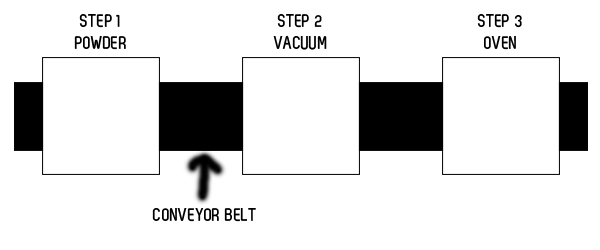
The diagram above is a graphic representation of the three-process method of lithographic printing. The substrate, once printed on, is passed through each process on a conveyor belt until the final product is created.
Step 1
Note: prior to this phase the transfer of ink to paper needs to have been made by any printing technique that ensures the ink is still wet, such as letterpress. Pigment inks are usually used for thermographic printing because they are slow drying.
The first process of thermography involves the application of a powder commonly known as embossing/ thermographic powder. Made from plastic resins, the powder coats the page and attaches itself to the wet ink (the areas selected for embossing).
Step 2
The substrate moves from the powder stage on to the vacuum process where the excess powder is removed from the paper, leaving only the inked parts coated and ready for the final stage.
The removal of excess powder is not always done with a vacuum. Instead there are some machines that use a combination of vibrations and a conveyor belt with runners that alter the orientation of the page (from horizontal to vertical) to allow excess powder to deposit into a sump, which is recycled and applied to following application processes in step 1.
Step 3
Once the powder has been applied and the excess removed, the substrate finally reaches the transforming process where it is passed through a radiant oven, exposed to temperatures between 900 and 1300°C (Wikipedia) for 2 to 3 seconds.
As it passes through the oven, the substrate rises in temperature, causing the powder-coated elements of the page to melt and transform until they look shiny, raised and slightly bubble-like.
The printed product then continues along the conveyor belt to cool once taken away from the heat and deposited in a paper collection tray of some kind. Some machines have a fan to cool the substrate as it exits the oven, however, this is not entirely necessary as the melted elements begin to dry and solidify once removed from the heat of the oven.
Extra Info
As we explained in Step 1, the transfer of pigment ink to paper needs have been made first to provide wet ink that the embossing powder can adhere to. Ideally a conveyor would run each printed piece of substrate from the printer to the first process of the thermographic procedure to ensure that the ink remains wet.
Common Problems
Like all printing there is a great deal of balance involved. These are just a few common problems that can occur with this printing process:
- If the ink is too dry then the powder will not adhere to it;
- If a sufficient amount of excess powder has not been removed then it can make the finished product appear blotchy;
- Too much heat could cause the paper to ignite;
- Too little heat could make the design appear too uneven with some elements melted and others not.
Video Resources
Here is a video that clearly shows how a hand-fed thermographic printing machine works:
Here’s is another video that displays a conveyor that runs through the entire process from the application of ink to substrate all the way through to the thermography:
The Benefits of Thermographic Printing
The major benefit gained from using this method of printing is the inexpensive visual appeal it can provide, much lower in cost than engraving and more natural looking compared to Spot UV printing – a print process that adds an even coat of ultra violet varnish to, giving evenly raised elements.
Crafty Home Tutorial
Now that we’ve explained the professional printers’ method of thermography, we’re going to provide you with a tutorial on how you can create a similar, if not the same, embossed effect at home for your own crafts.
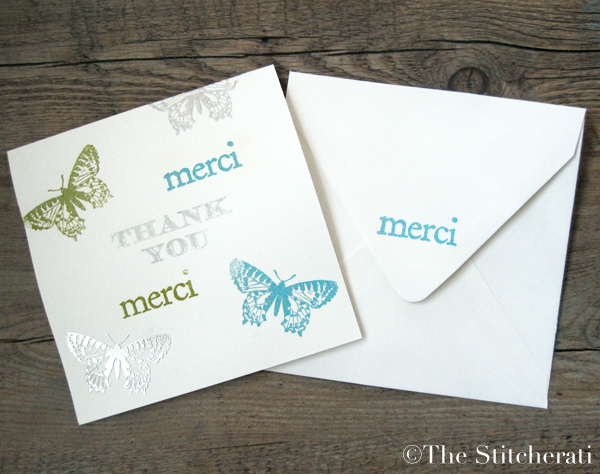
Image credit: thestitcherati
What You Will Need:
- A good quality rubber stamp
- A pigment ink pad
- Embossing powder
- Substrate (paper)
- Embossing heat gun (regular heat gun can also work)
Method:
-
- Evenly ink your rubber stamp with the pigment ink. We recommend that you turn the stamp upside down (impression side up) and dab it with the pad to ensure an even coat.
-
- Place your stamp impression side down onto the substrate and firmly apply an even amount of downward pressure until the impression has been left on the paper. Note: do not tilt your stamp from side to side as this could create a blotchy, and poorly defined impression.Once the impression has been made, generously cover that portion of the page in embossing powder until the entire design is covered. This has to be done whilst the ink is wet. Fortunately, pigment inks take a while to dry so you have some time to apply this.
-
- Tilt the paper to let the excess powder run off the page and into a catcher (a tub or another sheet of paper) so that you can pour it back into the pot for re-use. Whilst tilting you could also tap the reverse side of the page to shake off any excess powder that might be hanging in between the groves of the design.
-
- Finally apply heat from your heat gun to the design, directly above it (about 3 cm in distance from the page design) until it changes from its powder form to a bubbly, shiny looking design – at which point move the heat gun around the design if there is more to transform, otherwise it is completed.
-
- Sit back and admire your design.
Summary
Just to summarise the entire method of thermographic printing, the three key points to remember are:
-
- POWDER – embossing powder made from plastic resins are applied to wet pigment ink elements on a page;
-
- VACUUM – excess powder is removed from the page using either a vacuum or vibrations;
-
- OVEN – powdered elements of the page are exposed to 900-1300°C for 2-3 seconds until melted and bubbly in appearance.
Now that you know how thermographic printing is done, why not try out the tutorial we’ve provided in this article and see for yourself how the process is done in a manual environment?
If you have any comments regarding thermographic printing, please post them in the comments section below.


Wow! I never knew that this is such a “complicated” process and that it could be very easily acheived at home. thank you
Comments are closed.